LABA7 offers a shock dyno for every need, whether you’re working on bicycles and small-scale vehicles, dirt bikes, or even heavy-duty vehicles such as 4×4 or trucks. One thing is for sure, all of them are packed with the same features for you to take your tuning and serving game to an entirely new level.
Let’s take a look at what you can expect when running a shock dyno test.
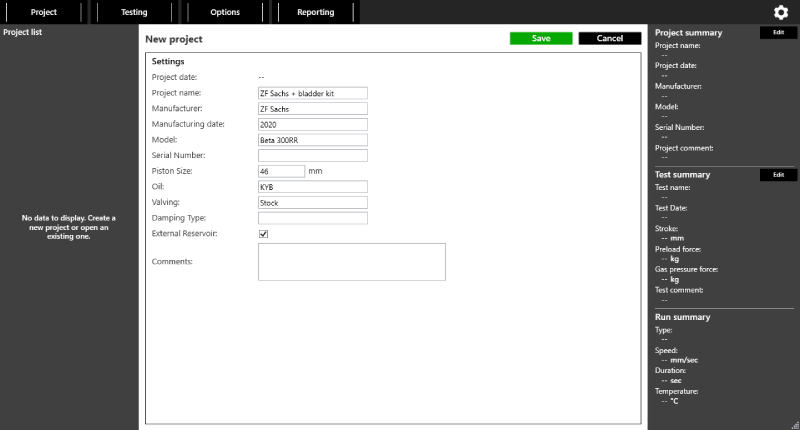
As you open the Shock Dyno software, you start by creating a new project. What pops right out is how much detail you can associate with your projects, making your test repository incredibly valuable and rich in information.
After installing a shock on the dyno, you need to calibrate the machine, so it can create a baseline before the test. It gathers information such as gas chamber pressure, stroke of the machine, and shock temperature, all of which are used to provide a filtered graph with only the relevant data.

Once calibrated, you can set the testing parameters.
It’s possible to set a warm-up cycle, where the machine will only start the real testing cycles once the shock reaches a specific temperature.
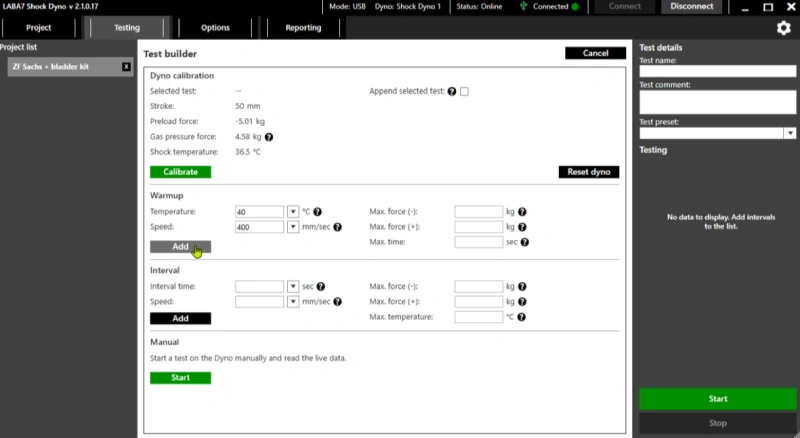
This kind of parametrization is unbelievably useful. In many cases, specific feedback from the damping system or even erratic behaviors might only occur once shocks reach a certain temperature. So if you can’t test them at their true operating temperature, all your shock dyno tests might be worthless.
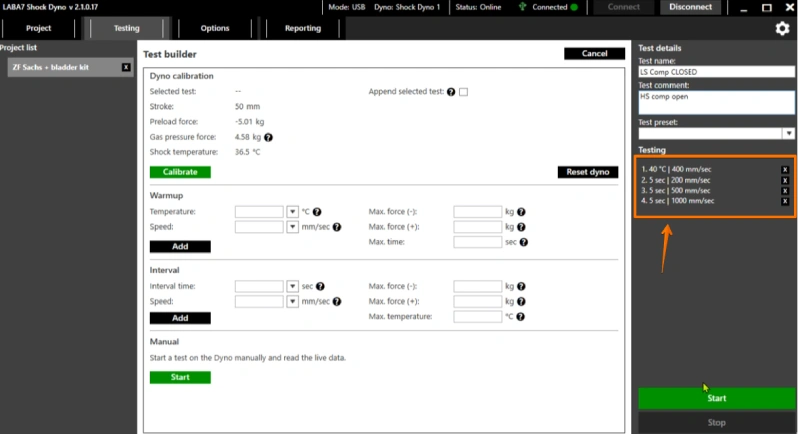
Then, you can start adding the cycles you want to put the shock under.
We’ll test this shock at three different speeds, for 5 seconds each, equivalent to low-speed, mid-speed, and high-speed compression cycles.
Depending on the shock dyno you acquired, you can have higher speeds to test. The Featherlight shock dyno can reach up to 1900mm/s, the Light and Mid Shock dyno up to 2500mm/s, and the Heavy shock dyno up to 3000mm/s. These bad boys are not playing around!
In this first shock dyno test, we’ll have the shock with the low-speed compression adjuster fully closed.
After setting a name for the test and whichever information you might want to associate with it, you can press Start to run the test.
While the shock is being tested, the software will show the live results of the test.
Once finished, you can access the test results on the left of the screen and dissect each cycle.
Running the shock once already provides us with really useful information, but LABA7 shock dynos allow us to run multiple cycles and tests within the same project, so we’ll run the shock with the same parameters, but this time with the high-speed compression adjuster fully closed and low-speed compression adjuster open.
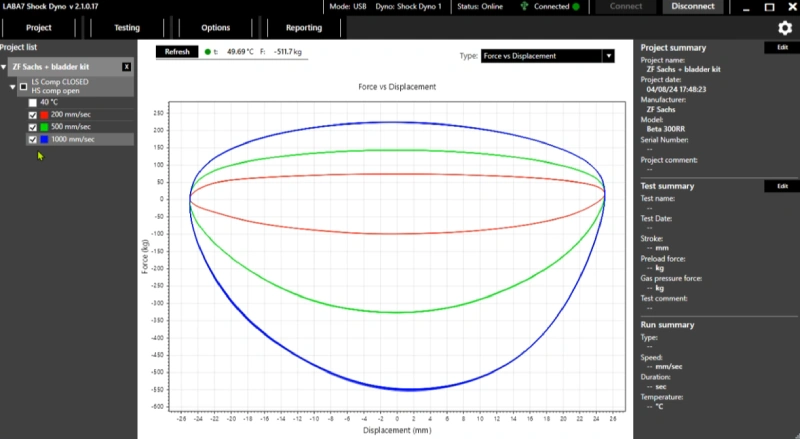
Once the machine runs all cycles once more, we have a glimpse of the true value LABA7’s shock dynos provide.
We can compare different shock setups at the exact same speeds and understand where exactly the changes we applied are being felt on the shock.

Not only can we understand how the damping is being generated throughout the compression and rebound stroke, but we can access different graphs for the same tests, such as average force and velocity, peak velocity, combined velocity, force over time, and temperature over time.
All of which help us identify possible issues far ahead or give us the confidence that the performance gains will be unquestionable.
This video shows a glimpse of what our machines can do, so stick around for more in-depth videos.
For more information contact us or read this article on how to read shock dyno graphs.